2019/12/22

GM Key Programming with MDI and Online SPS

Tutorial: GM key programming using GM scan tool and SPS (Service Programming System) online subscription.


Model example:
Chevrolet Tahoe 2016
(the procedure can be applied to other GMs)
Tools needed:
A GM scanner (GM MDIGM MDI2VXDIAG GM)
Original remote and a new remote key (add a remote)


Procedure:
(* Click to enlarge images)
After connect MDI2 interface and built connection
gm-key-programming-sps-1
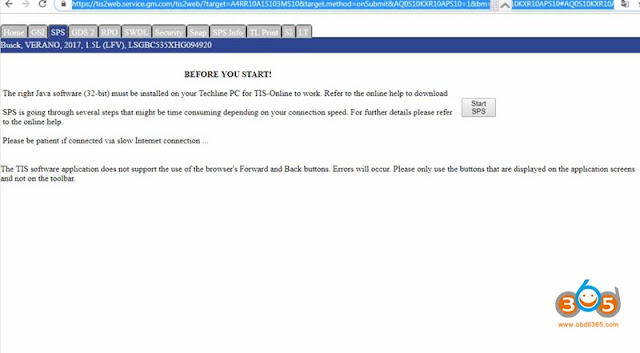
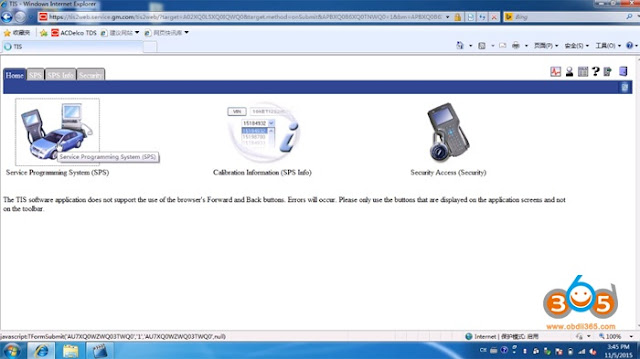
Access SPS programming
gm-key-programming-sps-2
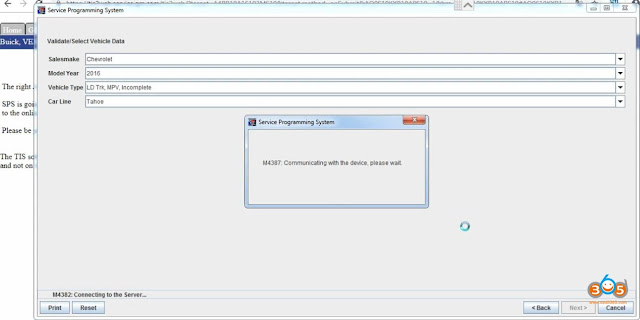
Select vehicle model: Chevrolet Tahoe 2016 Light duty truck
Communicating with the GM MDI
gm-key-programming-sps-3
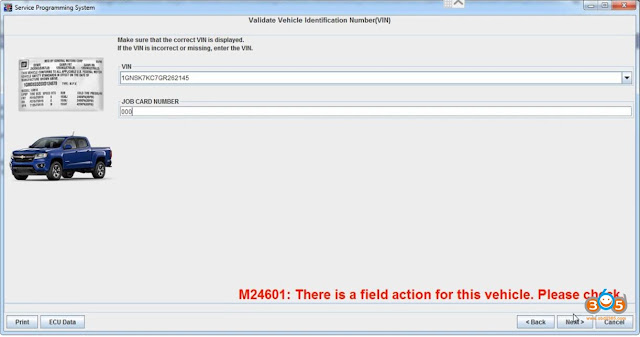
Detect VIN and enter job card number to access
(There is a field activation for this vehicle)
gm-key-programming-sps-4
Select controller: Keyless Entry Control Module and press Next
gm-key-programming-sps-5
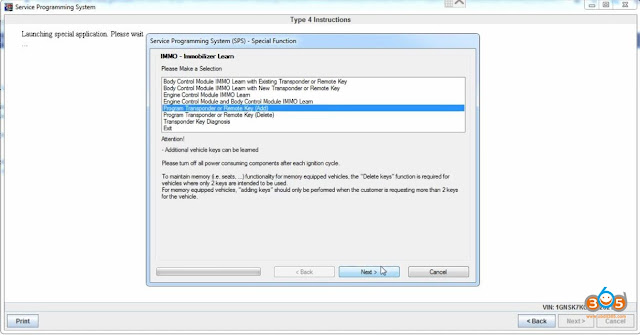
Select special function: Program Transponder or Remote Key (Add key)
Turn off all power consuming components after each ignition cycle.
gm-key-programming-sps-6
Insert next key in the transmitter pocket and press Next
Place all other keys outside of the vehicle
gm-key-programming-sps-7
Wait it counts down from 12 mins to 0
gm-key-programming-sps-8
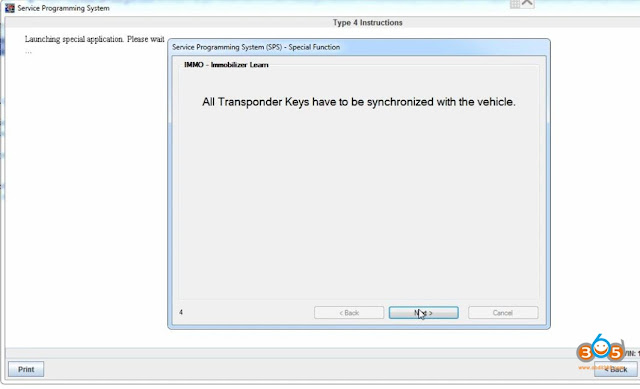
All transponder keys have to be synchronized with the vehicle.
gm-key-programming-sps-9
Follow steps below to sync key
1.Remove the key from the transmitter pocket
2.Press the Lock button on key
3.Press the Unlock button on key and press Next
gm-key-programming-sps-1-

gm-key-programming-sps-11
Starts to program next key
Insert next key in the transmitter pocket and press Next
Place all other keys outside of the vehicle
gm-key-programming-sps-12
Press Start/Stop button and start the engine
Current Power Mode Status: OFF
Wait 5 seconds
gm-key-programming-sps-13
Press Start/Stop button and start the engine
Current Power Mode Status: RUN
Follow steps below to sync key
1.Remove the key from the transmitter pocket
2.Press the Lock button on key
3.Press the Unlock button on key and press Next
gm-key-programming-sps-14
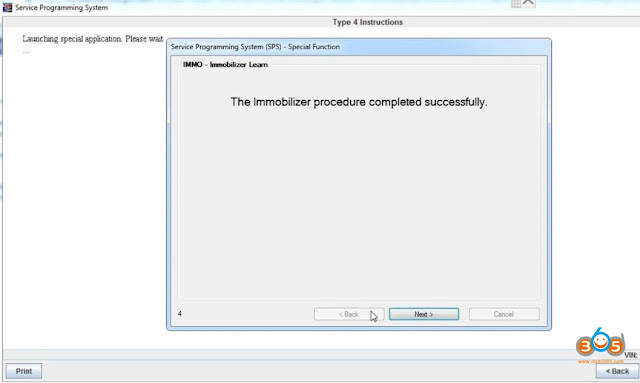
The immobilizer procedure completed successfully.
gm-key-programming-sps-15
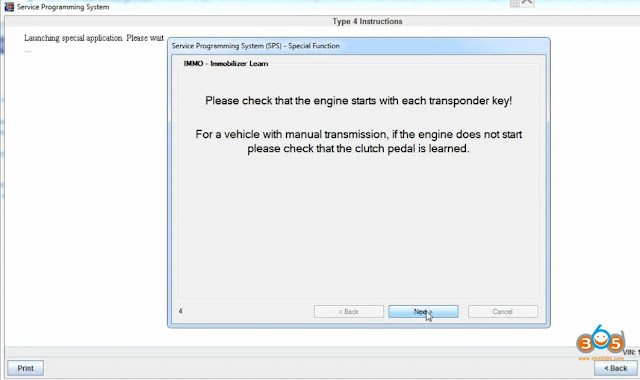
Check if the new key can start engine. For a vehicle with manual transmission, if the engine does not start, please check that the clutch pedal is learned.
gm-key-programming-sps-16
Action completed.
Clear DTCs.
gm-key-programming-sps-17
gm-key-programming-sps-18
gm-key-programming-sps-19
gm-key-programming-sps-20

gm-key-programming-sps-21
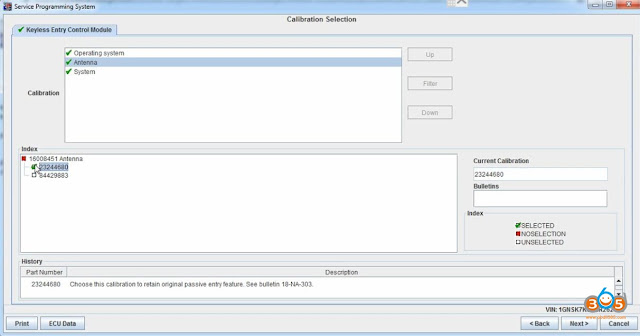
Perform account for wireless charger and disable passive enter calibration programming until finished.
The whole process is done.


2019/12/10

Do I Need to The Dealer to Replace a 99' Chevrolet Silverado 2500 New BCM

Here are tips for anyone with a 99′ 2500 silverado ext cab (4×4, 6.0L, 1 Ton running gear) and have found and purchased what is to be a BCM for the newer trucks, but not sure if it does need to go to the dealer to have this installed.

If you can do the following (not likely), you don’t need to visit a dealer…


Body Control Module (BCM) Programming/RPO Configuration


The body control module (BCM) must be programmed with the proper RPO configurations. The BCM stores the information regarding the vehicle options and if the BCM is not properly configured with the correct RPO codes the BCM will not control the features properly. Ensure that the following conditions exist in order to prepare for BCM programming:


– The battery is fully charged.

– The ignition switch is in the RUN position.

– The data link connector (DLC) is accessible.

Follow the instructions on the Techline Terminal and scan tool to program the BCM.

If the BCM fails to accept the program, perform the following steps:

– Inspect all BCM connections.

– Verify that the Techline Terminal and scan tool have the latest software version.

Passlock Learn Procedures

Requirements for Using Any Learn Procedure

Perform the Learn Procedure if any of the following components have been replaced:

Important: If any module is replaced, programming the module must be done prior to performing the Passlock Learn procedure.


  • The Passlock sensor

  • The body control module (BCM)

  • The powertrain control module (PCM)

  • The vehicle control module (VCM)


Passlock Learn Procedure — Using the Techline Terminal and the Scan Tool

Follow the instructions displayed on the Techline Terminal in Service Programming System (SPS) and the scan tool like MDI interface for this reprogramming procedure.

Auto Learn Passlock Procedure


Turn the ignition switch to the RUN position (NOT the CRANK position).

Turn the ignition switch to the CRANK position, then release to the RUN position (Do NOT start the vehicle).

Observe the security telltale for approximately 10 minutes.

After the ignition switch has been in the RUN position for approximately 10 minutes, the security telltale will transition from ON, then to OFF.

Repeat Steps 1–4 two more times.

After 3 consecutive cycles of the ignition switch are successfully completed, the vehicle will learn the new component on the next ignition lock cylinder cycle from the OFF position to the CRANK position, then to the RUN position. The vehicle will then start.

Clear the DTCs using a GM scan tool.

Here are good GM scan tools for use.
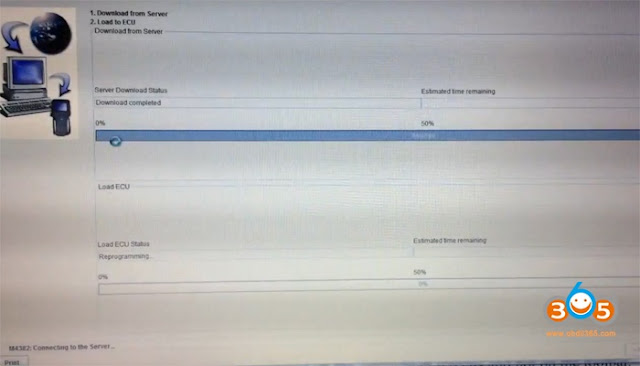
  1. VXDIAG VCX NANO GM:
vxdiag-vcx-nano-gm
  1. GM MDI:
gm-mdi

  1. GM Tech 2:
gm-tech2

The biggest difference of the three GM tools is:
  1. Tech 2 is hand-held and portable, while Vxdiag and MDI are PC-based
  2. VXDIAG VCX NANO GM software is updatable and works good for new vehicles even the latest
  3. GM MDI clone features good price for SPS programming

2019/12/02

How to use GM MDI to do Calibration Update by SPS Programming

Purpose:
Perform GM SPS (Service Programming System) Programming J2534 mode for instrument panel controller (IPC) calibration updates using GM MDI scan tool (original or a good high quality clone).
This can be for the ECU or any programmable module in the vehicle, such as the EBCM, TCM, Radio, or IPC that you may want to reflash.


Model example: Chevrolet Cruze Passenger car 2012
(Applicable to model year 2011 and up, which is when the Tech2 ended and was fully replaced by the GM Multiple Diagnostic Interface, or MDI and MDI 2, and TIS2Web subscriptions.) 
What you need to program:
High Quality GM MDI clone with WiFi
A laptop
GM online subscription (or https://www.acdelcotds.com/subscriptions)

GM MDI SPS Programming J2534 Mode ECU TIS2Web Calibration Update:
Select SPS programming->Start SPS
gm-mdi-sps-programming-calibration-update-1

gm-mdi-sps-programming-calibration-update-2

Select Interface as J2534 MDI and programming process: Reprogram ECU
gm-mdi-sps-programming-calibration-update-3

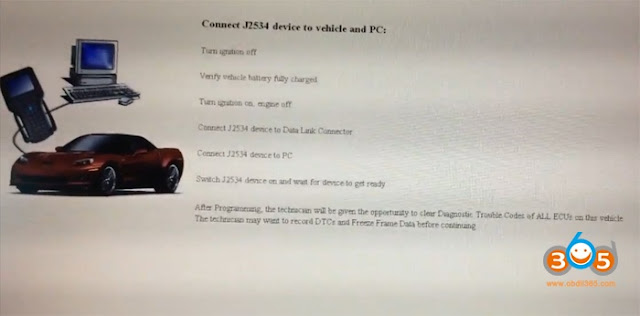
Connect J2534 device (GM MDI interface) to vehicle and PC
gm-mdi-sps-programming-calibration-update-4

gm-mdi-sps-programming-calibration-update-5

Turn ignition off
verify vehicle battery fully charged
Turn ignition on, engine off
Connect J2534 device to Data Link Connector
Connect J2534 device to PC
Switch J2534 mdi on and wait for MDI  to get ready
After programming erase all DTC of all ECUs
After communication is built, select vehicle model
gm-mdi-sps-programming-calibration-update-6
Chevrolet Cruze Passenger car 2012
gm-mdi-sps-programming-calibration-update-7

Display and confirm VIN
gm-mdi-sps-programming-calibration-update-8
gm-mdi-sps-programming-calibration-update-9

Select control module, function and type to reflash
–IPC Instrument Cluster
–Programming
–Normal programming type
gm-mdi-sps-programming-calibration-update-10
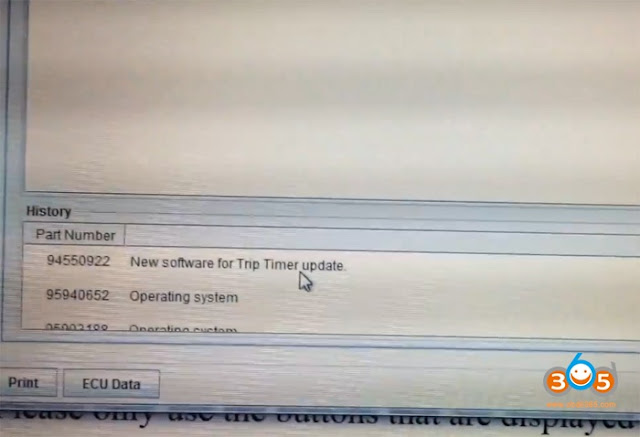
Check current calibration version and available update
gm-mdi-sps-programming-calibration-update-11

gm-mdi-sps-programming-calibration-update-12

gm-mdi-sps-programming-calibration-update-13
Perform new software for Trip Timer update
gm-mdi-sps-programming-calibration-update-14
During programming procedure, the dashboard turns black which is normal
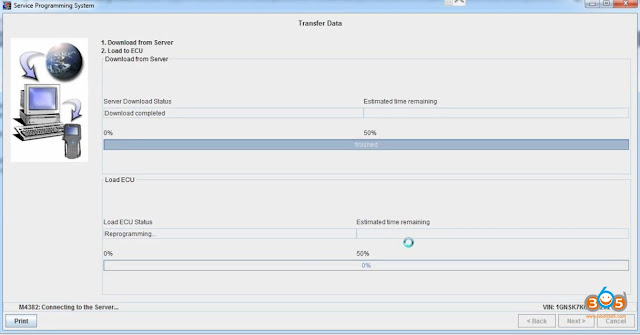
gm-mdi-sps-programming-calibration-update-15

gm-mdi-sps-programming-calibration-update-16
Wait until the programming process count down to 0
gm-mdi-sps-programming-calibration-update-17
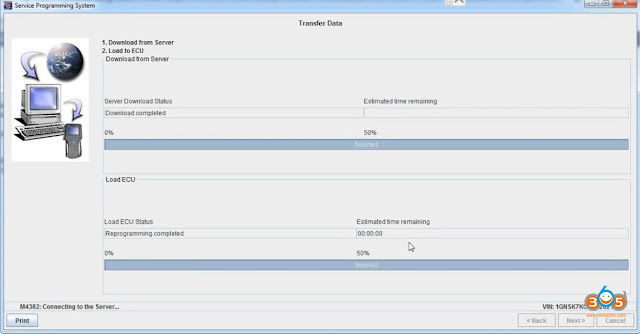
Turn off the key for 30 seconds and then back on to complete the programming reset the controller.  Dashboard turns on.
gm-mdi-sps-programming-calibration-update-18
IPC calibration update completed.
gm-mdi-sps-programming-calibration-update-19
Record the code and erase all fault codes existed.
Done.

2019/11/15

How to do Chevrolet Malibu 2017 PCM Programming?

Question: How can I do programming used pcm for Chevrolet Malibu 2017
I have mdi but what software i must use.

Answer:
For 2007/8 and up, you will need a GM subscription to be able to program the used or new PCM. There is no other way of doing it. If it was used, you would be able to do antitheft only without sps subscription. Using a different tool of course. But the VIN would need to changed and that’s done only by programming PCM with SPS GM subscription. There’s eeprom reading and such, but I don’t know how to do that. In the USA, it’s much easier and simpler to just buy the subscription and program it. Any errors and GM can help you. Good luck!
gm-sps-programming-1

gm-sps-programming-2

gm-sps-programming-3
in detail..

The powertrain control module (PCM) in your vehicle is the main computer controlling its various operating systems. For example, the PCM controls the engine, the transmission, the fuel system, and the speedometer. If the vehicle isn’t performing the way it should, the PCM can be reprogrammed to increase performance. Recalls are another reason your PCM may need to be reprogrammed. Since Chevrolet is a subsidiary of General Motors (GM), GM tools and software are used to reprogram a Chevrolet PCM.

Step 1
Use your web browser to go to GM’s calibration look-up website, and type in your vehicle’s VIN number to check for any programming updates to your PCM. If there are updates, you will need to purchase GM’s techline information system (TIS) programming software and service.
Step 2
Turn on your computer and plug the GM scan tool into it and your vehicle, using the pass-through cable. Turn on the GM  scan tool and load the TIS programming software from GM on your computer.
Step 3
Click the “Service Programming System” option on the main screen of your TIS software on your computer. The “Select Diagnostic Tool and Programming Process” window will appear on your screen.
Step 4
Click on the “Pass-Thru” option under diagnostic tool, “Reprogram ECU” under select programming process, and “Vehicle” under ECU location. Click the “Next” button in the lower-right hand section of the window to proceed.
Step 5
Enter the VIN number in the VIN text box in the “Determine Vehicle” window, and click on “Apply” next to the text box. This will fill in your vehicle’s data in the boxes below. Click the “Next” button to proceed.
Step 6
Go through the checklist in the “Preparing for Communication” window, and click next to confirm your VIN number. If your VIN number is incorrect, enter the correct one. Click “Next” in the bottom-right corner.
Step 7
Click on the “PCM/VCM” selection under the “Select Controller” section of the next window. Select “Normal” under programming type and click the “Next” button.
Step 8
Select the newest calibrations for each system in the “Calibration Selection” window by clicking on each system’s tab, and putting a check mark next to the highest number of calibration. Click the “Next” button in the bottom-right corner of the window after every tab has a green check mark on it.
Step 9
Click “Next” at the summary screen after verifying your recalibrations. If all of your calibrations are up-to-date, an error will appear indicating there is nothing to reprogram. If they are not up-to-date, a transfer window will open and the program will begin to download and reprogram your PCM with the calibrations you selected.
Click the “Close” button on the “Programming Complete” window after the reprogramming is complete. You can turn off your scan tool and remove it from your vehicle.
Tip
  • GM technology and software is expensive. If this isn’t a procedure you will do on a regular basis, you can have your PCM programmed at your local dealer or some local part stores. All you need is your VIN, mileage and the PCM that needs programming.
Warning
  • Make sure the battery in your scan tool is completely charged. If your battery dies while in the middle of reprogramming, irreparable damage may occur.
Items you will need
  • Chevrolet scan tool (GM MDI or Tech 2)
  • Serial pass-through cable
  • Computer
  • Internet access

Chevrolet scan tool for reference

Functions/ SoftwareGDS2Tech2WinGlobal TISTIS2000
DiagnosticsYesYesNoYes
ECU ProgrammingNo.
But you can log in www.acdelcotds.com to do programming
No.
But you can log in www.acdelcotds.com to do programming
Yes.
But only program
ECUs offline for part of GM vehicles.

Yes
Key ProgrammingYes.
But you have to program new keys online via
www.acdelcotds.com
Yes.
But you have to program new keys online via
www.acdelcotds.com
NoYes
SPS ProgrammingNoYesYesYes
(with Tech 2 Go-between)

Based on the chart, GlobalTIS and TIS2000 are you way to go.

Tool / SoftwareGDS2Tech2WinGlobal TISTIS2000
GM Tech 2NoYes
(for old cars)
NoYes
GM MDIYes
(for new cars 2010-)
Yes
(for old cars)
YesNo
Mangoose PRO GM IIYes
(for new cars 2010-)
Yes
(for old cars)
NoNo
VXDIAG VCX Nano GMYes
(for new cars 2010-)
Yes
(for old cars)
NoNo

Based on the second chart, you should have teh2 or mdi interface for ecu programming.
But mdi is better for new year models.

Conclusion:
GM MDI interface with GlobalTIS software is the best for Chevrolet Malibu 2017 PCM programming

2019/06/24

GM MDI 2 Clone vs. Original GM Multiple Interface

Look here: GM MDI 2 what’s the difference of the genuine and the china knock-off?
compared with MDI 1, what’s good of MDI2? Should you buy a new one?
ProductGM MDI 2 (genuine)GM MDI 2 (clone)
Photo
OriginalOriginal from the dealerChina clone off obdii365.com
Price1200 usd or so229 usd
WiFiYesYes
SpeedFastFast
SecurityGood
Use with relief
Good
Better than MDI
UpdateYesYes, update via HDD
Operation systemOptional
You can try MDI2 software on any possible systems
Windows 7 64 bit ONLY
Global TISYesYes
GDS2YesYes
Tech 2 WinYesYes
TIS2Web–SPS.YesYes
SPS programming for existing and future SGM vehicles
OBDII DiagnosisYesYes
ECU ProgrammingYesYes
Key ProgrammingYesYes
Pass-Thru ProgrammingYes, done by TIS2Web–SPSYes
Hidden Function ReflashingYesYes
VehicleVauxhall Opel, Buick, Chevrolet
1996-2017-future
all Vauxhall/Opel 16 pin vehicles from 1996 to 2017

Conclusion:
The MDI 2 genuine and china clone share the same functions.
They are different in the price and operating system only!
For a GM garage, you can buy the genuine to use with relief!
For personal use, the price of clone is good and it’s worth the money!
MDI 2 comes with GM software in a HDD that people don’t have to install software themselves and will have no installation issues!

Is it necessary to have a MDI 2 if you have a MDI already?
It depends.
If you are the one pursuit security and efficiency, it’s necessary to have a new MDI2 interface.

in detail… (all information below works for the original MDI2. for the china clone, it’s for reference only!)

The next generation of the J2534 GM Multiple Diagnostic Interface, MDI 2 (Fig. 1, right), offers increased processing power and security than the original MDI (Fig. 1, left) for faster programming speeds on current Global A vehicles as well as future Global B vehicles. The compact communication module is required in order to manage the transfer of data between a vehicle’s onboard network and a service technician’s PC.
gm-mdi2-vs-gm-mdi
Fig. 1

Both original and clone MDI 2 are now available in the market.

Both MDI 2 supports diagnostic applications — GDS 2, Data Bus Diagnostic Tool, and Tech2Win — as well as Pass-Thru programming applications — TIS2Web–SPS.

Enhancements to the tool were based on technicians’ feedback on how they use the MDI and how to improve it. It replaces the first generation MDI, introduced in 2007, for Pass-Thru programming on current GM models. The MDI 2 is backward compatible, so it can be used to perform Pass-Thru programming on all vehicles built since 1996.

The MDI 2 connects to the vehicle via the J1962 connector using a new DLC cable. Connection between the MDI 2 and the PC running the Global Diagnostic System 2 (GDS 2) software can be accomplished via standalone (USB), through a new Point-to-Point wireless Wi-Fi interface feature (a simple plug & play), or through the dealership network (Ethernet or wireless).

MDI 2 Full Kit

The EL-52100 MDI 2 kit includes:
  • MDI 2 Unit
  • SAE J1962 DLC Cable (Fig. 2)
  • 10-ft. USB A to USB B Cable (Fig. 3)
  • Ethernet Cable
  • D-Link Wireless USB Adapters (Dongles) (Optional; for wireless connection) (Fig. 4)

gm-mdi-2-full-package-1
Fig. 2

gm-mdi-2-full-package-2
Fig. 3

gm-mdi-2-full-package-3
Fig. 4

A DLC Cable Self-Test Loopback Adapter (Fig. 5) was sent to dealerships as an essential tool in December. It’s compatible with the MDI and MDI 2. It’s also sold separately through GM Dealer Equipment.

The adapter is used to test the DLC cable for open wires when used with the MDI Manager software. The adapter also can be used to power the MDI or MDI 2 on the workbench.

gm-mdi-2-full-package-4
Fig. 5

GM MDI 2 Connections (Fig. 6)
  1. USB Port Type A
  2. DB26 Connector (DLC Cable)
  3. USB Port Type A
  4. USB Port Type B – PC Connection Port
  5. Wireless Adapter (Dongle)
  6. Ethernet Port

gm-mdi-2-full-package-5
Fig. 6

New Features

  • Wi-Fi Connection– The USB Wi-Fi adapter uses a USB dongle that enables Point-to-Point connections without the need for Wi-Fi SSID information or a wireless router.
  • USB Connection– Uses a new, more secure Type B connector and Ground Offset Failure protection. A wired connection is recommended for longer programming events.
  • Power Source – The MDI 2 is powered from the vehicle battery via the DLC Cable. It may also be powered over USB to perform firmware updates only using a PC.
  • Power Backup– Internal batteries that were used in case of a power interruption have been removed, which eliminates the possibility of old batteries corroding over time and damaging the unit. Capacitors maintain power during engine cranking, so operation is maintained.
  • Firmware Download– Uses USB 2.0 for faster firmware downloads instead of a separate AC power supply.
  • Future Expansion– Additional USB ports, an SD memory card slot and Function buttons are built into the unit for future enhancements.
  • Operating Temperature Range– The temperature range has been extended to -20° to 70°C (the MDI range was zero to 50° C).
  • DLC Cable– The DLC cable is twice as long as the previous cable and connects at the top, making it easier to use. The cable only connects to the MDI 2. A self-test adapter (accessed through the MDI Manager) can be used to test the integrity of the cable.

MDI Manager Software

The MDI Manager must be installed on the PC in order to configure, update and run diagnostic applications targeted for the PC.  Initially, use the MDI Manager software to set up the configuration of the MDI 2. The MDI Manager is also used to update the firmware on the MDI 2. Visit the TIS2Web/GlobalTIS website to determine if a newer version of MDI Manager software is available.

Wireless Dongle Setup

The first time the MDI 2 is used, the point-to-point USB dongle must be paired with the PC, which will install the necessary drivers on the computer. One dongle should be plugged into the PC and one into the MDI 2. (Fig. 7) The dongles are identical. Use either one for either connection. Remove the bottom dust cover to access the port.

TIP: Do not plug the dongle into a USB hub. It must be plugged directly into the computer.
gm-mdi-2-full-package-6
Fig. 7

Connect the MDI 2 to the PC via the USB cable. After starting the MDI Manager, the Point-to-Point connection is automatically configured. The USB dongles are intended to stay plugged into the PC or laptop at all time. If it must be removed, safety eject it by right-clicking on the Windows USB icon in the bottom right toolbar on the computer.

Dealerships considering new purchases should look into the MDI 2 for its many new advantages The original MDI will continue to be supported, but will not work on future Global B models.

– Thanks to Chris Henley

Related Post: